Thursday, April 25, 2013

Need a Mother's Day gift that is truly personalized but also guaranteed to arrive in time? 

Get a custom made "Mother's Day Garden Portrait" floral painting from Paintings by Kirsten Elizabeth Gilmore.
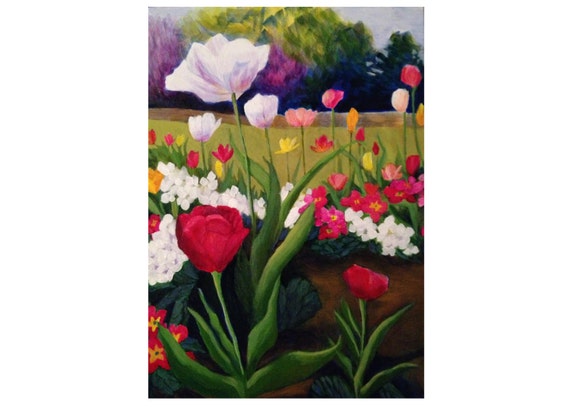

Even if you need a last minute Mother's Day gift, the ecard gift certificate for this original floral painting will get there on time--even if you wait to buy until the day before Mother's Day. 
Mother's Day (Sunday, May 12th) is nearly here! If you want something truly memorable and personal, yet still affordable and able to get to your mother or grandmother in time, I have a limited time offer for you.

Limited time offer:  Mother's Day Garden Portrait Painting  From now through May 11th, you can buy a custom portrait of your mother's garden or grandmother's garden, with delicate brushwork and subtle glazing. 


With this offer, you will get a customized portrait for the price of a made-to -order painting

Four Mother's Day Garden Portrait sizes are available:   

  • mini-portrait ($39.99 plus shipping) 6" X 8" X 1 and 3/8"
  • small garden portrait ($49.99 plus shipping) 8" X 10" X 1 and 3/8" 
  • medium portrait ($74.99 plus shipping) 16 X 20 and 3/8" (About the size of a large baking sheet pan.)
  • large portrait ($149.99 plus shipping) 24" X 36" X 3/4" (This is two feet by three feet, so an "over-the couch" size painting.)

THE CUSTOM PAINTING PROCESS:

1.) Find the right size listing:
Visit my etsy shop, and click on the listing for the size "Mother's Day Garden Portrait" that you want.

2.) Buy the painting.
Click "add to card" to buy, and either pay through PayPal (much preferred) or by credit card. I also accept etsy gift cards. If you wish to use one for either all of the purchase or a discount on the purchase, the etsy website will automatically guide you step by step through this process.

3.) Send me your gift recipient's contact information.
Please include your gift recipient's email address AND mailing address in the "note to sender" during checkout. If you forget to do this, please email the information to me.

4.) An ecard is sent.
I will email an ecard to your gift recipient on Mother's Day. It will have a Mother's day greeting, an explanation of the custom painting process, and my contact information in it.

5.) A photo of her garden is sent to me.
Either you or your gift recipient sends me at least one image of the garden as a photo reference to turn into a painting.

6.) Art production and communication by email:
Over the next few weeks, I will communicate with your gift recipient directly:  emailing photos of the artwork in progress, taking suggestions or editing when asked.

This is the truly personalized part of the process. Your mother or grandmother gets to make choices about her painting's colors, style, and composition. Together, we will make the painting just the way she wants it. 

7.) Final approval.
I will send an image of the finished work and get your gift recipient's approval. When she is happy with the image, I varnish it, let the varnish dry, and ship it to her.

8.) Shipping
I ship via FedEx Ground or FedExHomeDelivery for larger packages. I ship via USPS priority mail for smaller packages. I carefully wrap and cushion your artwork so it will arrive safely.

HOW TO HANG:
The two smaller canvases are deep profile so they can sit on shelves or hang from a nail. The larger canvases are standard profile and can be hung either with or without a standard size, open back frame. I paint the edges, so no frame is needed.

CONTACT ME BEFORE BUYING TO ADD ON OPTIONAL EXTRAS:

Hanging wire installation available:
For the medium size or large size paintings, I can install hanging hardware and professional wire on the back for an $10 fee (the supplies at local craft stores are roughly $6 for this, if you would prefer to do it yourself.)

Premium knife paintings available: 
Note that this listing is for brush paintings, not knife paintings. If you prefer a knife painting, contact me for a different price list (both materials and supports cost more). Also, do know that the production process is longer, since they they take more time to make and more time to dry.

My contact email:  paintingsbykirstenelizabeth@gmail.com

BUY MORE THAN ONE TO SAVE ON SHIPPING:
If you buy two paintings from my etsy store, shipping is automatically reduced, even if you are shipping the items to different people.

Paper Gift Cards are NOT available:
The ecards included are fast and free. I decided not to make paper cards available. I realize that some mothers or grandmothers still do not use email, but the process of collaborating with them on the painting's creation would become too difficult and costly for me to do by mail or phone.

COPYWRITE NOTE:
Note that, by purchasing this custom garden portrait, you are giving me permission to do a derivative artwork, based upon your photograph (or your mother's photograph). Even though the photograph was yours and the painting is yours, all the rights to the image and rights to reproduce the image are still mine. So, for instance, I can still make prints based upon this painting.

This is common practice for all U.S. artists. I mention it only because I want to be sure customers have full knowledge of the legal aspects of buying commissioned art. 

Thursday, February 14, 2013

I'm so proud of my adult painting students!


Week 4 of Beginning Acrylic for Adults


Last night, during the "Beginning Acrylics" course at the Urbana Park District, my students painted a fluid, watercolor-like layer over the sculpted, molding paste knife painting from the week before. This is a more challenging project, since the absorbent surface pulls the paint this way and that is somewhat unpredictable ways. Imagine if handmade watercolor paper became a sculpture:  that is what painting over molding paste is like. But, both students tackled the challenge, and I think the results are beautiful! The photos above show the change from layer 1 to layer 2.


Registration for the new, Intermediate Acrylics course is still open. (Note:  if you click on that link, scroll to page 35 for the course description.)

Friday, December 21, 2012

Tips for working on a colored ground:
Acrylic painting techniques & ways to fix mistakes

How to make light colors look vibrant:
Light colors on darker grounds--especially translucent light colors--can look dull. Yellows can look green against a blue because the layers optically mix. Here is one way to counteract this effect.

  1. Paint the part you want to be a bright color in white.                          
    ***Notice that some of the white was painted thickly (towards the bottom) while the white brushstrokes near the top are thinly drybrushed on. The opacity of your white brushstrokes will affect what kind of result you get when glazing.)

    Close-up view of the differences in opacity

  2. Let that dry. Then paint over with your light, bright color. You can even get neon yellow effects this way.                                    

If you decide you don't want it that bright, you can always glaze over with another color. In this case, I mixed cerulean blue with a soft gel gloss so the paint dries translucent and has a slight texture to it. I layered this over the lower half of the purple shape. I made a similar, textured glaze of red to go over the red and yellow parts of the composition. 


What did the glazes do?

The red glaze helped unify the red shapes, changing the neon yellow parts into orange. The blue glaze helped enrich the color of the purple shapes, making it more vibrant and varying the hue from top to bottom. Notice that I did not glaze over the top part of the purple shape with blue--that would have turned the yellow brushstrokes into a dull green. I also purposefully did not glaze over the thin yellow lines that cut across the composition. They retained their brightness without overpowering other colors.

How else can you use a mix of soft gel gloss and acrylic paint?

You can see the shiny, raised brushstrokes made with the same mix of soft gel gloss and paint that made the blue glaze. The difference is in how thickly it was applied and not smoothed out.
How to paint "wet-on-dry" masked shapes
A DIY Acrylic painting tutorial

Photos and paintings are by Kirsten Elizabeth Gilmore. All rights reserved.

In the last tutorial, I showed you how to drybrush over blue painter's tape to create a visually textured shape with a clean, straight edge. This tutorial uses the same method, but with thick, wet paint.

Here is a close-up view of a recent painting (work-in-progress).
Notice the crisp lines, even in areas with highly-textured surfaces.
Bonus material:  Fixing crooked edges
This tutorial will also show you how to "over-paint" to correct a dried, uneven paint line or edge. Everyone makes mistakes, from time to time, while painting. This simple technique can help you tremendously.

Materials:
  • Blue painter's tape for delicate surfaces
  • Acrylic paint ("thick body" or thickened with a gel medium.) Note that Galeria brand's "soft body" acrylics are actually a consistency between "thick body" and "soft body", so they will work for this demo without anything added to them.
  • Palette an artist's plastic palette works or a plastic lid, cleaned and recycled from a food container or baker's parchment (used as a disposable palette) Parchment should be taped to the table.
  • Flat brush (preferably nylon)
  • water tub
  • paper towel
  • airtight plastic container (for stay-wet, paint storage)
  • surface to paint on This could be a fully-dried painting or a painting with a dried base coat or, you could do this on a pre-primed, white hardboard or canvas.
  • palette knife for mixing paint


Procedure:


  1. Make sure your surface is fully dry before you begin.
  2. Decide where you want your line or shape. 
  3. Mask around that area with blue painter's tape. If you want a line, mask on either side of the line to determine its width. Press hard at the edges to ensure the tape is secured well with no wrinkles.          
    Notice how The top line I am masking is to make a correction to a wobbly line.
  4. Load your brush half-way up the bristles with a thick glob of paint. Then, paint inside the shape.                               
  5. To make a patterned line, brush different colors over the masked shape (as in the photo below.)                                                    
  6. Before you lift the tape, plan where you are going to put it. It will have wet paint all over it. While working, I sometimes have a plastic disposable grocery bag nearby for wet trash. The trouble is that the tape sticks to the bag opening and can create a mess. So, I keep a clean, plastic lid from a food container to "stick" the tape to. You could do the same with a paper towel laid on the table.
  7. When you remove the tape, you should get a clean edge to your shape.


How I use this technique in my own paintings:

Here are more views of my 24"X36" painting-in-progress that uses this technique:
Closeup-view of the heavy texture and clean edge.


Thursday, December 20, 2012


How to Mask & Drybrush 
over a colored ground
DIY acrylic painting tutorial

Why do this? Using blue painter’s tape to “mask out” sections of a painting will allow you to texture paintings with drybrushing while still getting crisp, clean edges. This tutorial extends the former one on how to test and mix colors.

Materials:
  • Blue painter's tape for delicate surfaces
  • acrylic paint: two different colors, each mixed into three different values:  dark, medium, and light
  • plastic palette
  • Flat brush (nylon or bristle)
  • water tub
  • plenty of paper towel (Paper towel works better than a rag for drybrushing)
  • airtight plastic container (for stay-wet paint storage)

Directions: 
  1. Lay some blue tape across your dried, base painted canvas.
  2. Make sure the tape is long enough that it goes all the way over the side and onto the back a bit.                                      
  3. Smooth it down with your finger starting on one end and continuing all the way along the tape.
  4. Place dabs of one color set on the palette:  for example:  (dark violet  medium violet, and light violet)
  5. How to "load" the brush for drybrushing:  Start with the darkest value. Take a very dry, flat brush and just barely dip the tip of it in the darkest paint. 
  6. Find a clean part of the palette and brush back and forth over that spot, thinning out the paint. When it seems so thin you can see the brush and no globs of paint on the brush, you are ready to use this loaded brush on the canvas.
  7. Lightly, lightly tickle the surface of your canvas with the brush.
  8. The paint should coat the raised parts of the surface and let the colored ground show through the recessed areas.                              
  9. When you are done, rinse your brush thoroughly. Then, dry it as much as you can.
  10. In this sample, I included some "wet-on-dry" marks for variety. They are the dark patches.
  11. Continue this process using the medium value paint, then the lightest value paint. 
  12. Then do the same process for your second color set (dark, medium, and light red-orange in my example.)                                          
  13. When you are completely done with drybrushing in both colors, do a deep clean of your brush (soap and water and ensuring nothing is stuck in the ferrule.)
  14. When you finish cleaning, you are ready to remove the blue tape. Start at one end and carefully, slowly pull, trying to keep the tape  low to the surface without getting your hands full of paint. Beneath the tape will be your colored ground. The edges of the masked off shapes should be relatively smooth. For a completely smooth line, see my other tutorial on this.
  15. Discard the tape. Let the painting dry.                                                                

Wednesday, December 19, 2012

Color Planning with Swatches:
Mixing primaries, tints, and shades

Your goal for this DIY acrylic painting tutorial is to mix, test, and choose two colors that go with your base coat color. Then, you will mix a tint and a shade of each of these colors to give your piece a range of values.

Materials:
  • small strips of paper or paper pad
  • pencil with eraser
  • primary colors of acrylic paint
  • palette knife 
    • preferably diamond shape, flexible metal


Here's a photo of my favorite painting knife.

  • small, flat brush of any kind
  • plastic palette or baker’s parchment paper 
    • The parchment acts as instant disposable palette. 
    • Avoid using a paper plate—those soak up the paint too much.
  • Airtight plastic container 
    • with enough room for your knife to comfortably scrape the bottom (such as Rubbermaid's long, low container).

Procedure: 
  1. Add small amounts of red, yellow or blue to the palette. Only mix two colors at a time. Mix thoroughly with the side of the knife, in a scooping and squishing motion until no streaks of color remain.                                 
  2. When you find a color you like. Stop, and wipe off the knife.
  3. Write color recipe on the back of a scrap of paper.
  4. Using your flat brush, make a paint swatch on the front of that scrap on the very center of the paper strip.                                                
  5. Keep making color scraps until you have found two you like that go with your base coat color and with each other.
  6. Scoop up half of the mixed color you with your palette knife, and put it inside of the airtight plastic container. Close the lid tightly. 
  7. Mix the other half with a dime sized dab of white. Mark the strip with this new color just to the right of the original.
  8. Add more white paint until you get a significantly lighter tint of your color. Mark the strip of paper to the right of the last swatch.
  9. Store this tint in your plastic tub.                                              
  10. Clean your knife.
  11. Scoop out the original color from your tub onto the palette.
  12. Repeat the process to create shades, only this time, add a little drop of black each time. Black is potent, so you only need a small pea-sized drop at a time. 
  13. Paint these color swatches to the left of your main (central) color.                           
  14. Repeat steps 1-13 with two other colors mixed together.              


    1. You should end up with two strips full of tints and shades and a recipe for each original color in the back.                   


    "Base coating" a canvas:
    How to prepare a toned ground

    What is base coating? "Base coating" or "basecoating" is a contemporary term used by decorative painters and folk artists. An older, more traditional painting term that means much the same thing is creating a colored "ground". "Imprimatura" is a related, traditional art term which does also mean the first layer of paint on a canvas, but, imprimatura refers to a translucent layer of paint. Basecoating typically refers to an opaque layer of paint. 

    Why base coat? You can immediately get rid of the "white flecks" that paintings without a basecoat can get. Here you can see those white flecks up close:
    Close-up view of early stage of a painting by artist, Sharon Furner

    DIY PROJECT: Creating a rough-surfaced basecoat:

    While some decorative painters seek to minimize any visible brush strokes, creating an even surface, today's demo purposefully creates a rough basecoat with raised ridges from brushstrokes. (This will become important during a future tutorial on "drybrushing" because the surface provides a texture for drybrush strokes to catch upon.) If you prefer a smooth, toned ground, I suggest you use Golden Fluid Acrylics and check out William Kemp's blog tutorial on creating an evenly-toned, acrylic ground.

    Materials:
    • 8"X8"X1/4" pre-primed, archival hardboard (The samples uses inexpensive panels with pre-cut dovetail slots in the back for hanging, available from DickBlick online. Or, you can prepare your own.)
    • One color of acrylic paint (For the sample, I used Winsor Newton's Galleria brand)
    • one medium-sized, flat-shaped nylon brush (3/4"-1.5" works well for this size panel.)
    • tub of clean water
    • paper towel or clean rag (for drying your brush)
    • Recommended:  Plastic dropcloth cut as a tablecloth:  This can easily be re-used, since dried acrylic paint peels right off of it.

    Directions:
    1. Squeeze out paint in a blob about the size of a half-dollar (about 1” circle.)
    2. Take out your flat brush, dip it in the water to moisten it, then dry it on your towel. (pre-moistening the bristles makes later brush cleaning easier.)
    3. Hold the hardboard panel face-up, like a pizza with your non-dominant hand. I am right-handed, so I would hold the painting with my left hand.                           
    4. With your dominant hand, pick up the brush and load it with paint. The paint should go only half way up the bristle.                                      
      1. Start painting the edge of the panel.
        • Don’t push too hard, or you’ll drop the panel! 
        • Paint in short strokes straight downward.
        • You will get with a ridge of paint on the top and an even layer of paint on the side.
      6. Quickly, while the paint is still wet, take your brush, but NO NEW PAINT, and smooth the ridge of paint on the surface of the panel in long strokes towards the center of the panel.

      7. Take a break to clean your brush. 
      • (You might want to put the panel down near the edge of the table, so you can easily pick it back up again.)
      8. Continue that process along each edge, turning the board carefully as you go.

      9. When all the sides are painted and all ridges are smoothed, finish painting the top of the panel with long, smooth strokes. Your painting will not look perfectly uniform. That’s a good thing, since we will be using those small ridges later when layering over this base coat. 

      10. Place it on the table to dry. Deep clean your brush. Dry your brush.

      Challenges during this project:

      • Try to avoid fingerprints in the paint surface. If you make one, quickly brush back over that area for a more natural look.
      • Smooth down all ridges that occur at the edge of the surface of the painting.

      For finished, original paintings made on 8"x8" hardboard panels, visit my etsy shop:
      http://www.etsy.com/shop/PaintingsByKEGilmore?ref=si_shop