Saturday, July 13, 2013

A chevron knife painting in progress

This is a multi-step painting that includes: 1.) making a stencil from scratch and, because it is a pair of paintings, a second, inverted stencil, 2.) knife painting in ombré gradation, and finally 3.) brush painting.


Here is a look at the finished gray and yellow piece:


Here is a close-up view under warm lighting:


Some close-up views under cool lighting:


Originally, I used a dark umber for the blue and brown painting (as shows in the first painting below.) The photos show two alternate ways of hanging the piece so the designs align (although they could also hang separately instead.):


I changed the brown to lighten it a medium value and glazed over the lighter blues to deepen them slightly and to match the variegated look in the yellow piece:

This is how the pictures look next to each other now.  This photo best captures the current brown and current blues.

The next steps will be:
1. Choose whether to keep the brown as is.
2. Find out whether any of the knife painted colors need to be altered (this is still possible with tape and a second layer of knife painting.
3. Choose edge colors. Currently, the brown has a dark brown edge and the gray has a gray edge, but both could be painted black.

Here is another piece I did recently in the same style, but with a slightly altered composition and lighter blues:

Monday, July 8, 2013

A work-in-progress, Ikat abstract brush painting

Take a look "behind the scenes" at the layered abstract process. 

Abstracts are sometimes misrepresented as "simple" or "easier" than realism when they actually can be quite intricate. Hopefully, a look at the way these paintings are made can dispel such notions. 

I wrote this post to show some photos of a work-in-progress, Ikat abstract brush painting in a deep, indigo blue. 

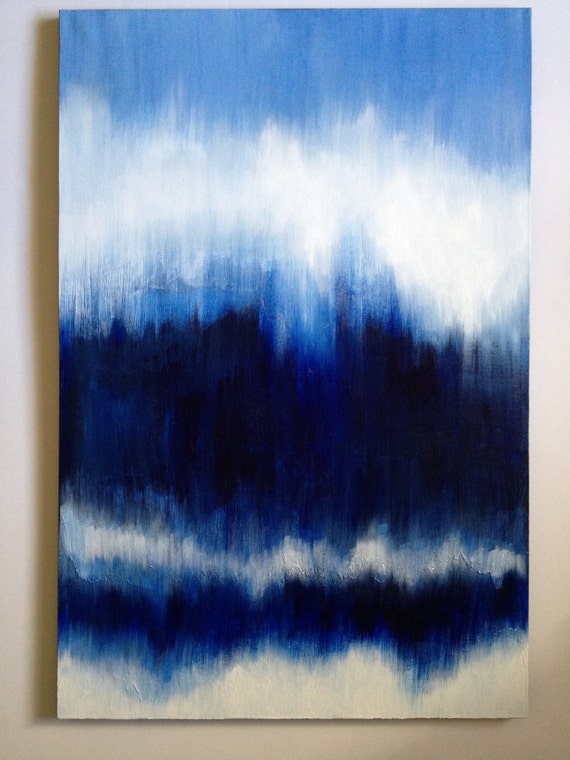
blue abstract painting, large original art on canvas, indigo, white, ikat, ombre, 24X36
The current commission is a larger variation based this finished, blue and white ikat original

Here are the process photos for the new, 2ft x 4ft variation:

These first, white photos show the texturing of the surface, before any paint is added.

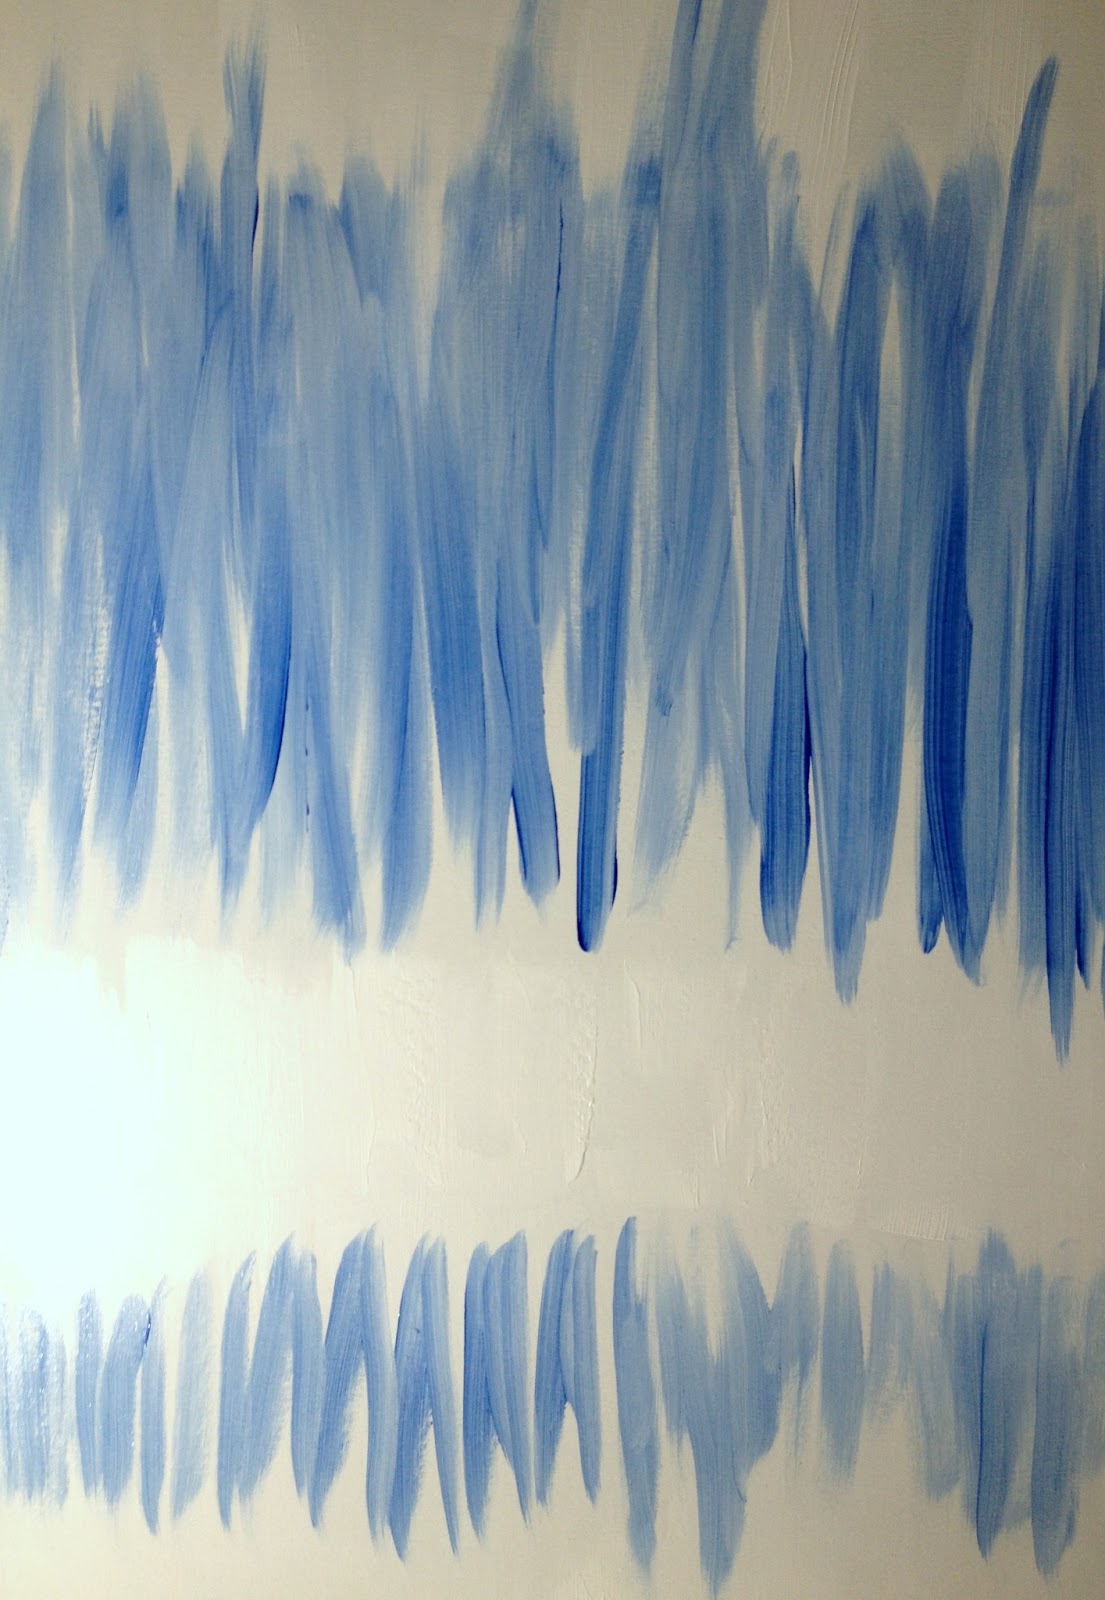
The next step is a light glaze, with expressive, gestural brushstrokes that begin to structure to the piece.


The piece will eventually be hung horizontally, but for these first strokes, I can get better control by turning the painting to be four feet tall. Luckily, that pneumatic drafting chair pictured can adjust to quite a height, so it is possible to reach the top of the piece while still sitting.
 The second and third glazes continue to deepen the values. Opaque layers are also added at this point


Now, for some thick, textured brushstrokes and knife strokes. I love how the painting looks at this stage. In the future, I plan on doing another painting that stops at this stage with it's energy and drama, but, to make this piece a soft ikat as promised, I need to keep layering on top of this particular painting.


 This is how the whole piece looks when the darkest, translucent glazes are added. Texture hides beneath the color at this point and needs to be brought back out again.

The following four images are all closeups of the painting as it stands now, with white drybrushing over those darkest areas. There is still a week's worth of refining to go, adding lightness back into the picture by using soft, wide brushes that delicately graze the surface to make soft, subtle transitions from the lightest white areas.

I'll be sure to post a picture of the finished work soon. :)


Tuesday, July 2, 2013

Variations on my Emerald Abstract Painting


Instead of making exact, painted copies of artworks, I now am making variations on them, in order to create a series of original, yet related paintings.

Here are two variations I made recently. Each one is 24"X36"X3/4" on cotton stretched canvas:

(All images in this blog post:  Copywright 2013 Kirsten E. Gilmore. All rights reserved.)

Variation 1:


Here are close-up details of Variation 1:
This is one of my favorite parts. It reminds me of a tree-lined  mountainous landscape.


This image captures some of the painting's intense blue passages.


Variation 2:
This is the painting as a whole.
This shows the semi-gloss sheen to the piece that picks up the light and reveals more of the saturated colors within.
 Here are close-up details of Variation 2:


In stronger light, you can see more of the colors within. this area


3/4" profile sides are painted black, so there is no need for a frame.

Saturday, May 11, 2013

Opaque projectors for transferring small sketches to large canvases

How do you take a tiny sketch and make a huge painting, without losing the liveliness of those first marks?


For me, the answer is:

Use an opaque projector. 

Here, I have painted a background already, and I am tracing my drawing using white paint mixed with acrylic glazing fluid.


Why use white paint? 

Mistakes can be simply erased with a clean, wet brush--paint wipes easily off a less-absorbent surface like this. The white paint is a better choice than black, since a white under-layer lets translucent colors shine more brightly when they are layered over it.

Thursday, April 25, 2013

Need a Mother's Day gift that is truly personalized but also guaranteed to arrive in time? 
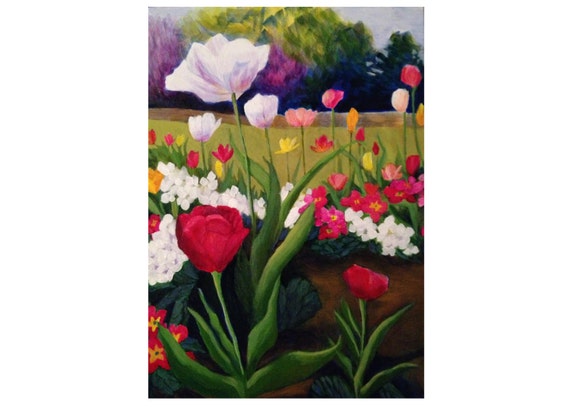
Get a custom made "Mother's Day Garden Portrait" floral painting from Paintings by Kirsten Elizabeth Gilmore.


Even if you need a last minute Mother's Day gift, the ecard gift certificate for this original floral painting will get there on time--even if you wait to buy until the day before Mother's Day. 
Mother's Day (Sunday, May 12th) is nearly here! If you want something truly memorable and personal, yet still affordable and able to get to your mother or grandmother in time, I have a limited time offer for you.

Limited time offer:  Mother's Day Garden Portrait Painting  From now through May 11th, you can buy a custom portrait of your mother's garden or grandmother's garden, with delicate brushwork and subtle glazing. 


With this offer, you will get a customized portrait for the price of a made-to -order painting

Four Mother's Day Garden Portrait sizes are available:   

  • mini-portrait ($39.99 plus shipping) 6" X 8" X 1 and 3/8"
  • small garden portrait ($49.99 plus shipping) 8" X 10" X 1 and 3/8" 
  • medium portrait ($74.99 plus shipping) 16 X 20 and 3/8" (About the size of a large baking sheet pan.)
  • large portrait ($149.99 plus shipping) 24" X 36" X 3/4" (This is two feet by three feet, so an "over-the couch" size painting.)

THE CUSTOM PAINTING PROCESS:

1.) Find the right size listing:
Visit my etsy shop, and click on the listing for the size "Mother's Day Garden Portrait" that you want.

2.) Buy the painting.
Click "add to card" to buy, and either pay through PayPal (much preferred) or by credit card. I also accept etsy gift cards. If you wish to use one for either all of the purchase or a discount on the purchase, the etsy website will automatically guide you step by step through this process.

3.) Send me your gift recipient's contact information.
Please include your gift recipient's email address AND mailing address in the "note to sender" during checkout. If you forget to do this, please email the information to me.

4.) An ecard is sent.
I will email an ecard to your gift recipient on Mother's Day. It will have a Mother's day greeting, an explanation of the custom painting process, and my contact information in it.

5.) A photo of her garden is sent to me.
Either you or your gift recipient sends me at least one image of the garden as a photo reference to turn into a painting.

6.) Art production and communication by email:
Over the next few weeks, I will communicate with your gift recipient directly:  emailing photos of the artwork in progress, taking suggestions or editing when asked.

This is the truly personalized part of the process. Your mother or grandmother gets to make choices about her painting's colors, style, and composition. Together, we will make the painting just the way she wants it. 

7.) Final approval.
I will send an image of the finished work and get your gift recipient's approval. When she is happy with the image, I varnish it, let the varnish dry, and ship it to her.

8.) Shipping
I ship via FedEx Ground or FedExHomeDelivery for larger packages. I ship via USPS priority mail for smaller packages. I carefully wrap and cushion your artwork so it will arrive safely.

HOW TO HANG:
The two smaller canvases are deep profile so they can sit on shelves or hang from a nail. The larger canvases are standard profile and can be hung either with or without a standard size, open back frame. I paint the edges, so no frame is needed.

CONTACT ME BEFORE BUYING TO ADD ON OPTIONAL EXTRAS:

Hanging wire installation available:
For the medium size or large size paintings, I can install hanging hardware and professional wire on the back for an $10 fee (the supplies at local craft stores are roughly $6 for this, if you would prefer to do it yourself.)

Premium knife paintings available: 
Note that this listing is for brush paintings, not knife paintings. If you prefer a knife painting, contact me for a different price list (both materials and supports cost more). Also, do know that the production process is longer, since they they take more time to make and more time to dry.

My contact email:  paintingsbykirstenelizabeth@gmail.com

BUY MORE THAN ONE TO SAVE ON SHIPPING:
If you buy two paintings from my etsy store, shipping is automatically reduced, even if you are shipping the items to different people.

Paper Gift Cards are NOT available:
The ecards included are fast and free. I decided not to make paper cards available. I realize that some mothers or grandmothers still do not use email, but the process of collaborating with them on the painting's creation would become too difficult and costly for me to do by mail or phone.

COPYWRITE NOTE:
Note that, by purchasing this custom garden portrait, you are giving me permission to do a derivative artwork, based upon your photograph (or your mother's photograph). Even though the photograph was yours and the painting is yours, all the rights to the image and rights to reproduce the image are still mine. So, for instance, I can still make prints based upon this painting.

This is common practice for all U.S. artists. I mention it only because I want to be sure customers have full knowledge of the legal aspects of buying commissioned art. 

Thursday, February 14, 2013

I'm so proud of my adult painting students!


Week 4 of Beginning Acrylic for Adults


Last night, during the "Beginning Acrylics" course at the Urbana Park District, my students painted a fluid, watercolor-like layer over the sculpted, molding paste knife painting from the week before. This is a more challenging project, since the absorbent surface pulls the paint this way and that is somewhat unpredictable ways. Imagine if handmade watercolor paper became a sculpture:  that is what painting over molding paste is like. But, both students tackled the challenge, and I think the results are beautiful! The photos above show the change from layer 1 to layer 2.


Registration for the new, Intermediate Acrylics course is still open. (Note:  if you click on that link, scroll to page 35 for the course description.)